On the ill-fated N97, the biggest problem was that there was about 50MB too little space to play with to begin with. After six months of life, with a few application updates and email use, the free space dwindled to near zero, with predictable catastrophic effect on the operating system's operation!
With newer devices like the N8, with bigger system disk, the problem is a lot less severe, but with Qt updates and other system components being added in cyclically, there's a real danger that space might get worryingly low if you don't know what you're doing. And with that in mind, let's make sure that you know all the tricks and techniques needed:
NB. The exact settings paths and menu options below are from a Nokia N8 running Belle, but I've tagged this piece for older Symbian handsets since the general principles apply just as equally. Be aware that exact menus and settings will vary slightly!
NB2. Although nothing should go wrong when fiddling with files and settings below, this is a good time to remind you to do regular syncs of your data (to desktop or cloud) and to do regular backups (to desktop or microSD). You can never have too many copies of your data. And make sure you've got all relevant passwords written down - just in case!
1. Put all non-critical apps on mass memory
This sounds obvious, but it's surprisingly easy to switch your Nokia Store installation preference to install to 'C:Phone Memory', for installing a theme or always-on background utility*, and then forget to switch it back to 'E:Mass memory' afterwards.
* Because your mass memory (E:) and microSD card (F:) get locked out whenever you plug your phone into a desktop or laptop computer, anything that simply has to be always available does actually need to be installed on C: It's why most Nokia core updates always go to C: directly, without asking you.
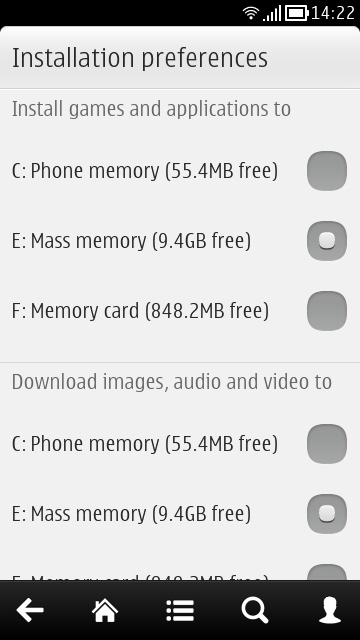
- Check that your install preference is set up properly now by going into the Nokia Store and then tapping on the account icon. Scroll down and tap on 'Installation preferences'.
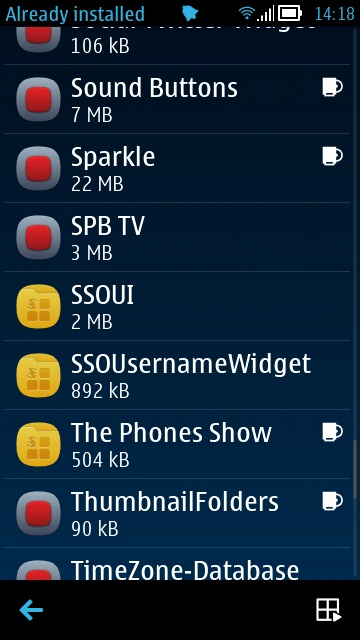
- Go into Settings>Installations>Already installed and look down the list for any (obviously non-Nokia) items that don't have a little 'memory card'/disk icon besides them. Such applications may well have been installed onto disk C: by mistake - I found several in my case (SPB TV, shown below). Long press on each and 'Remove' them, then re-install from the Nokia Store now that your correct preference is in place.
2. Clear out your email
No, I don't mean delete messages - you'll want to keep all these on the appropriate (IMAP/Exchange/webmail) server, of course. The problem is that Nokia Email keeps all sorts of old messages and miscellaneous files and attachments all squirrelled away in a tortuous system folder structure. And however much it tries to do so efficiently, there's an inevitable build up of 'cruft'. Luckily there's a painless way to clear all this out and reclaim, typically, between 10 and 25MB of space in one fell swoop:
- Go into Email and then Settings. Long press on your email address/mailbox name and choose 'Delete mailbox'. Confirm the deletion.
- Resist the temptation to add it back in again immediately. Wait 10 minutes. Go and have a cup of tea, etc. Background processes are even now clearing out the mailbox's files. If you keep an eye on disk C: in File manager, you'll see the free space gradually rising.
- Choose 'New mailbox' and add your email account back in again. You'll lose a few MB from the initial sync and download, but you'll still be up to 20MB better off.


3. Empty out your Web browser cache (and more)
As with any computer, clearing your browser's cache of visited sites and images can give a big short term gain of free space, though of course, it'll all gradually fill up in normal use again.
The easy way to do this is to:
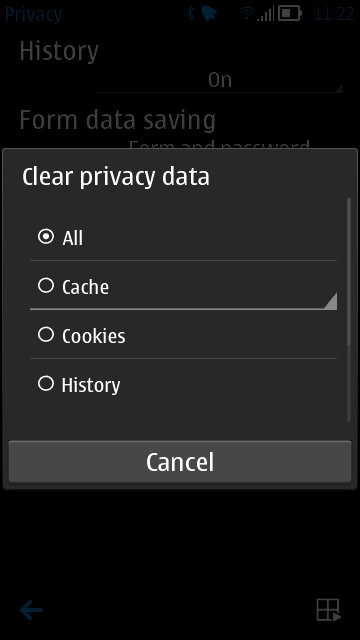
- Go into Web and tap on the menu icon and then on 'Settings>Privacy'.
- Tap on the 'Clear privacy' line and then on the 'Cache' bullet point - the UI's not too obvious at this point, but the browser cache does get immediately deleted.
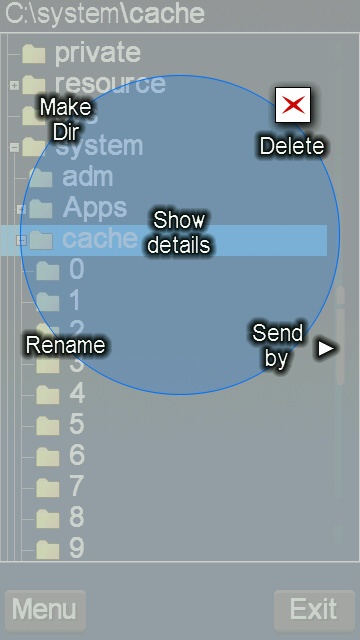
The hard way to do this is to use a tool like X-plore to delve into the system folder as shown below and delete the appropriate cache folder manually. The advantage of this approach is that there are numerous other system cache and temporary file areas that are worth zapping if you're desperate for short term disk space back. Just be careful - only go down this road if you know what you're doing! By deleting the wrong folder it's possible to stop normal operation of the phone and then you're into option 5, below!
4. What else?
It goes without saying that you'll have checked that you don't have any large documents, music or media files stored on disk C: - the basics of file management can be done using either File manager or Photos, as appropriate - this is basic smartphone/computer use. If you're in doubt as to what's clogging up your C: disk, long press it in File manager and choose 'Details'. Images, videos, documents, all get itemised.
5. Last resort
As a last resort, you can always do appropriate backups and syncs and then use *#7370# in the dialler screen to wipe your phone. Then rebuild/reinstall as needed (i.e. Sw_update, latest Store, latest Maps, set up email again, sync back on your PIM data, reinstall third party applications) - we're talking an hour of work at least though and there's the possibility that you'll miss something important, so treat this very much as a last resort and for people who a) know what they're doing and (like me) b) secretly enjoy the 'set up from scratch' process!
___________________
In my case, and the prompt for writing this tutorial, I was down to 17MB free on C: and, after doing steps 1 to 3 above, I got up to 60MB free, a massive improvement - and no need to go to step 5 at all.
If you try any or all of the above, comments welcome on their efficacy in your case - how much did you gain?
Steve Litchfield, All About Symbian, 25th April 2012